Wednesday, September 2, 2015

Recipe of the DAY: Crockpot Hashbrown Casserole

Crockpot Hashbrown Casserole


Simple Slow Cooker Hashbrown Casserole

Who is ready for a yummy, crockpot pleaser?  

Can you resist those potatoes?  

How about that cheese? 

And don't get me started on the bacon!  


This Hashbrown Casserole is so good, super simple to put together and a great way to use that crockpot that you tell yourself you are going to use more....but then, you don't.  Plus, the prep is not to bad!  

Ore-Ida Hash Browns - 6 lbs.Of course, I would say, this would be excellent for breakfast, but...let's face it...I love HASHBROWNS and will admit to eating them for dinner on multiple occasions.  Hey, at least I am honest!

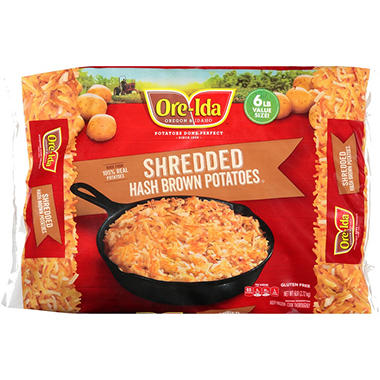
I love hashbrowns so much that I went to Sam's Club twice this month and without even thinking, picked up the 6 lb. bag both trips. (Opp!)  I just get out my handy dandy scale and weigh out my 20 ounces from my jumbo bag.  (Hunny, guess what, your having Hashbrown Casserole for breakfast and lunch...all week!) 


Serves: 6 to 8 (as a side)


INGREDIENTS:

3 tablespoons butter
1/4 cup finely chopped onion (can use frozen)
1/4 teaspoon garlic powder
3 tablespoons flour
1 cup milk
1/2 cup sour cream
1 package (20 ounces) Ore-Ida shredded Hashbrowns (can get at Sam's Club) 
3/4 - 1 cup shredded sharp cheddar cheese
Salt and Pepper (your discretion)

Optional Topping: 1/4 cup finely chopped mushrooms, cooked and chopped bacon, fresh parsley. 


INSTRUCTIONS:
  1. In a small saucepan over medium heat, melt butter.
  2. Add in chopped onion (and mushrooms if adding)  and saute until tender. Add in garlic powder. Briskly whisk in the flour until a thick dough forms.  Cook for about 1 minute.
  3. Very slowly add in the milk, whisking constantly until thickened.
  4. Reduce heat to low. Simmer to thicken.  Remove from heat and stir in the sour cream. 
  5. Spray a large slow cooker (6 qt) with nonstick spray.
  6. Pour in the creamy base.  Top with the whole package of Hashbrowns and shredded cheddar cheese. (note: if you like cheese, top with full cup)
  7. Add salt and pepper and stir together.
  8. Cover and cook on high for 2-3 hours.  Remove the lid and allow to cook for an additional 30 minutes to an hour to get crisp on top.  Depending on crock pot, may need to watch. 
  9. Top with toppings of choice, such as bacon, parsley, seasoning. 


Delicious and Simple CROCKPOT Hashbrown Casserole (No cream of soups)


5 Ways Writers Can Make Money

5 Ways Writers Can Make Money...

Here we are...on my Blog

Life at Gray Gables


First, let me say this, blogging is great. I put in my blogging efforts, have great stats and get the buzz topics out and about.  


But, with all great things...comes a Downside to Blogging.  


Well, Blogging takes up a LOT of time!  Luckily, there are a few ways that you, the writer, can be compensated for your blogging time and efforts


Here are a list of 5 EASY WAYS you can start making MONEY from YOUR Blog:


This seems simple right?  It is probably the first idea that comes to mind when we think about monetizing our blog site.  But, there are some preliminary steps that need to be taken before we implement this strategy. 

First, do not use a FREE Blogging Platform.(Yes, strike 1 for Life at Gray Gables, right!) 

What this means is that  you need to purchase your own domain name and hosting, so you can monetize as you wish. 

The free version of WordPress is not intended for profit use.  So selling ads and participating in affiliate marketing is out of the question if you're using the free platform. 

Blogger, however, has a few perks to using their free platform. 

Next step, you need to have a system in place for serving your ads. There are numerous plugins that you can download for free to add this functionality to your site. Once you download the plugin, you will be able to set up add zones, track clicks and impressions, as well as schedule run dates. 


When you sell ad space, advertisers will want to know your blog's statistics, which is why this information is of importance. You can get all this information for free by adding Google Analytics to your site. 


And lastly, you will need to set up a page for your advertising options. Usually this page will include your ad sizes and locations, traffic stats, and cost to run the promotion.


Now that you have the basics set up, there are basically two ways to get started with your advertising, 1) Direct Ad Sales and/or 2) Work with an Ad Network.

With Direct Ad Sales, you get 100% of the profit, but you also do 100% of the work. If you are just getting started, you will most likely need to do some prospecting for sponsors.
But, when you work with an Ad Network, they do all the legwork, but this means your cut is a lot smaller. 
Here are just a few of the advertising networks you can work with:


2. Affiliate Marketing

Not only is affiliate marketing a great way to add some extra revenue to your blog, but it can also be your blog’s main source of income. With affiliate marketing, you promote products and services, and in exchange, you earn a commission on each sale that's generated from your site.
With this method, you’ll want to promote products and services that are within your niche and that you, yourself would use. A good rule of thumb is … if you wouldn’t use it or recommend it to friend, don’t promote it on your blog. Your integrity always trumps earning a quick buck, so don’t lose readers by promoting lousy products.
To find affiliate programs to promote, you can check out some of the bigger networks likeAmazonShareASale, or CJ. Or you can look on individual websites to see if they host their own affiliate program. Generally, this information will be on the footer of the website or on their contact page.


3. Add a Job Board

Many freelance, career, and niche-related blogs will add a job board to their site for additional income.  Of course, to do this, you’ll need to create an area that accommodates this sort of function. 

4. Paid Community

Many bloggers add private membership communities to their sites that offer advanced training. Depending on the resources and tools that your membership site offers, you may be able to charge an annual or monthly recurring fee.
To add a private community to your blog, you’ll need to purchase a premium plugin, like Member Mouse or Magic Members. Once the plugin is in place, you’ll be able to register, manage, and bill clients all in one spot.

5. Create and Sell an Information Product

Depending on your niche, writing an e-book or other information product may be an excellent way for you to cash in

So how do you know whether or not selling an information product is right for you? 

If you’re often asked about a certain subject over and over again — that’s a good clue. If you’re always asked, “Can I pick your brain?” that’s another good clue.
For this monetization method, you’ll need to add a shopping cart to your site. A plugin like WordPress Simple PayPal Shopping Cart or a service like E-Junkie can add this additional functionality to your blog … and you can start cashing in.


One final note: 
Making money from your blog doesn’t happen overnight. 
But with a little persistence and some well thought out content, you can reap financial rewards for your efforts.


I am still working towards the move to monetize. It is a tough one. One that requires planning and determination. I am building my blog. Re-scratching the surface and re-inventing myself and my blog to reflect these terms. I did not start blogging to make money. I started blogging to have something to leave to my kids, something that I am proud of, that is me, in essence. I would love to build this blog into something more, but I am taking baby steps, advise from others and trying to stay true to the love that I have for writing. I am having fun, sharing content and writing things that come from my heart, what better plan for the future can I have, than: 

Life at Gray Gables


Tuesday, September 1, 2015

BAKE NOW! The BEST Soft Chocolate Chip Cookies


The BEST Soft Chocolate Chip Cookies - no overnight chilling, no strange ingredients, just a simple recipe for ultra SOFT, THICK chocolate chip cookies! ♡ pinchofyum.com: The BEST Soft Chocolate Chip Cookies - no overnight chilling, no strange ingredients, just a simple recipe for ultra SOFT, THICK chocolate chip cookies! ♡ pinchofyum.com

THE BEST SOFT CHOCOLATE CHIP COOKIES

Is your mouth watering just looking at the picture above?  (I won't tell, I promise...)  

These cookies are:
  • soft
  • thick
  • layered with chocolate chips
  • filled with buttery dough baked into a heavy, milk-loving cookie

I bet you CAN'T WAIT to turn that oven on and start making these yummy, delicious, mouth watering cookies, can you?


Wait...do you hear that... they are singing you a love song.... 

BAKE ME...BAKE ME...


The BEST Soft Chocolate Chip Cookies - no overnight chilling, no strange ingredients, just a simple recipe for ultra SOFT, THICK chocolate chip cookies!  ♡ pinchofyum.com


Recipe:

Makes: 12 (regular sized) cookies (or 8 BIG cookies)


INGREDIENTS
  • 8 tablespoons of salted butter
  • ½ cup white sugar 
  • ¼ cup packed light brown sugar
  • 1 teaspoon vanilla
  • 1 egg
  • 1½ cups all purpose flour
  • ½ teaspoon baking soda
  • ¼ teaspoon salt 
  • ¾ cup chocolate chips (you can get creative and use a combination of chocolate chips and chocolate chunks here for melted yum yum yum)

INSTRUCTIONS
  • Preheat the oven to 350 degrees. Microwave the butter for about 40 seconds to just barely melt it. It shouldn't be hot- but it should be almost entirely in liquid form.

  • Using a stand mixer or electric beaters, beat the butter with the sugars until creamy. Add the vanilla and the egg; beat on low speed until just incorporated - 10-15 seconds or so (if you beat the egg for too long, the cookies will be stiff).

  • Add flour, baking soda, and salt. Mix until little crumbles begin to form. Use your hands to press the crumbles together into a dough. It should form one large ball that is easy to handle (right at the stage between "wet" dough and "dry" dough). Add the chocolate chips and incorporate with your hands.

  • Roll the dough into 12 large balls (or 9 for HUGELY awesome cookies) and place on a cookie sheet. (You can also use a small ice cream scoop, for perfect cookies) Bake for 9-11 minutes until the cookies look puffy and dry and just barely golden.   Warning, friends: DO NOT OVER BAKE. Take the cookies out even if they look like they're not done yet. They'll be pale and puffy.

  • Let cookies cool on the pan for a good 30 minutes or so (okay, eat four or five but then let the rest of them cool). They will rest and turn into dense, buttery, soft cookies that are the best in all the land. These should stay soft for many days if kept in an airtight container. you can also freeze them, if they can last that long!

NOTES:
The 3 most important things about this recipe are 1) melting the butter, 2) adding enough flour, and 3) not baking for too long.

If you find that the dough is wet and it REALLY sticks to your hands, you probably need a little more flour. This is important or you will end up with flat cookies. You should be able to roll the balls of dough between your hands without any issues.


Nutrition label what?
I don’t even know what you’re talking about. Calories don't exist in COOKIES...uh hmm..


Have Chickens? Avoid making these 15 MISTAKES!

At the beginning of the summer, our family became the proud owners of Chickens...(key the BANJO!) and so the farm life had begun.  We started with three (3) chickens that were about a year old (or so we were told), they were seasoned, which made it that much easier for us, the beginners
A few days before the girls arrived, Hubby found a coop on CL that just needed a little work, for a tiny investment of $30. It was a real nice coop once he cleaned it all up.  
We picked a spot in the yard and then, I come home from work one day and there are now three (3) chickens occupying our homestead
I must say, if you are on the fence about getting chickens, they are super easy to care for. We are a little scared to handle them, as our chickens are not the friendliest bunch, but they come to us when we feed them and cluck when we talk to them. Basic chicken care is fairly simple as well. 

Like all living things, they need fresh food and fresh water daily. They like my kitchen scraps, which are very good for them, but I still avoid giving the girls anything rotten, as that can be harmful to them. 


But, as easy as Chickens are...there are still some mistakes that you can make and if at all possible, I am here to help you avoid these! 
  1. Avoid bringing home your chickens BEFORE you have finished their coop. (really, this just adds extra stress to the handy man who is busy working on their home, and new chickens that you want to free range, still need to be penned for a little bit of time before "free ranging").
  2. Melt your brooder with your heading lamp. (this one is something I am taking note of, as the winter months start to approach)
  3. Don't check the chicks for pasty butt. (no explanation needed here.) 
  4. Leave your chickens food out for the rats. (there are special dishes people and they work great. We don't have RATS per-say...field mice is our creature of habit)
  5. Make your coop impossible to clean. (Hubby made our coop and was very diligent in making sure latches and doors were accessible just for this reasoning)
  6. Leave your coop opened at night for a raccoon buffet. (we have Hawks and Coyotes!)
  7. Get more birds than you have space to keep. (Yes, we did this! This is why the girls got an upgrade) (sh!)
  8. Get the wrong breeds for your climate. (this is more important than you might know. Do you research!)
  9. Keep them in too small of an area. (give these girls room to run!)
  10. Let them roam about the neighborhood. (you might end up with one less chicken and your neighbor might be eating good tonight- js)
  11. Let them eat poisonous plants in your yard. (knowledge is power)
  12. Buy meat bird without a plan to butcher. (again, education. The chickens have a purpose)
  13. Keep an illegal rooster in a city neighborhood. (need I say more?)
  14. Make your mobile chicken coop too heavy to move. (you will be in a pickle!) 
  15. And last but not least...the NUMBER ONE mistake of all...repeat ANY of THESE MISTAKES above! (Um, have you not learned anything?)
It has been an experience on our home front, a positive one, having chickens.  We even added to our chickens, introducing three (3) more, which were surprisingly welcomed with open arms by the three (3) OGs. 

Now, they live in harmony among one another and it has been awesome to watch them mix and mingle and exciting for the girls to collect eggs daily. This does not mean that we do not continue to learn, everyday there is research, everyday there is something new we need to know or find out and everyday there is something that we improve upon. 


Hey...

Happy Roost... more eggs Produced!


Our 6 year olds picture of Chicken Dogge (2015) 


Featured Post

How To Make Your Blog Go Viral

Blogging, Lessons on working, Stay at Home Moms by: Kel Amstutz Last year, I posted a blog post that went viral . (much to MY surp...