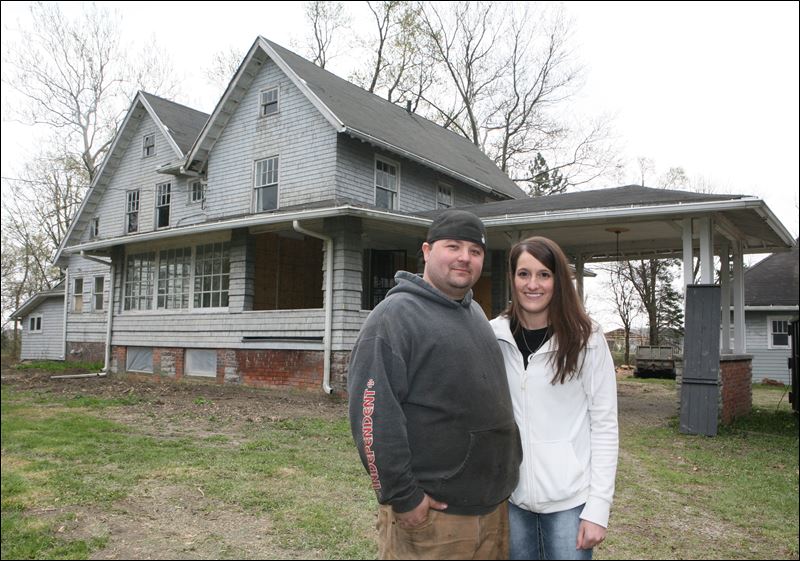
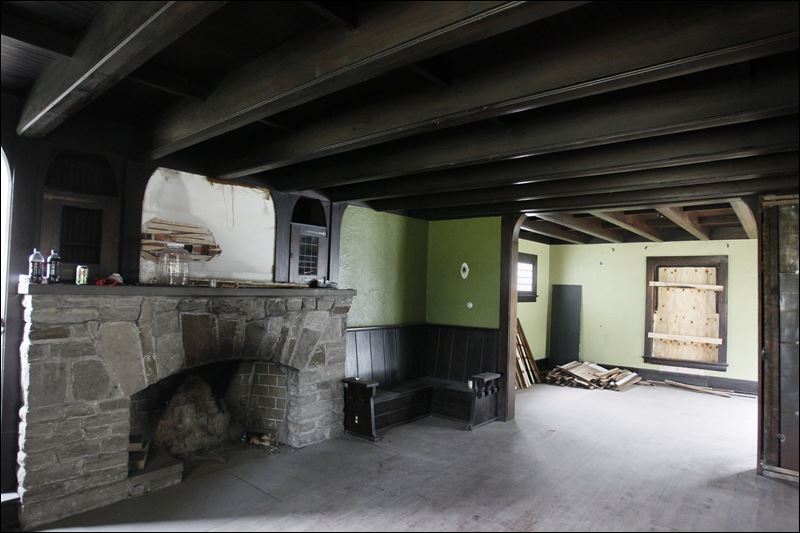
The older your home, the more charming and beautiful it may be - but its age also increases the chance of more problems to occur.
From lead paint to asbestos, here is what I have learned and what to do when you can do if you find potential danger!
There are more than 30 million homes, or 1/3 of the homes in the United States- that are at least 50 years old. That is a lot of beautiful homes, but they could be haunted with endless potential problems just below the surface!
[disclaimer: I am not a certified professional, I am a homeowner of an old historical farm house that was built in 1892. I have been in remodel zone for the past 2 1/2 years and these are some of the things that we have personally encountered throughout our journey!]
Here are some things to look for in your old home:
1. Old electrical systems... a.k.a. The Villain
FACT: A study performed by the Consumer Product Safety Commission in the 1980's found that fires occurred disproportionately more often in homes that are more than 40 years old.
In our home, we had to update the entire electrical system. It was an old circuit system in which the wires used a rubber compound (widely used before the 1950's) which become brittle with age. The only way that you can tell if or what kind of problems you might have lurking under your old plaster walls is to hire a trusted electrician to inspect the house. (which I strongly recommend)
Some key signs that you probably have an electrical problem include:
- circuit breakers tripping or fuses blowing
- flickering lights/ dimming lights (without a dimmer or a ghost)
- unusual sounds and smells from your electrical system
- hot switch plates
- electrical shocks (no thank you!)
If you do 2 professionally installed updates to your old home, you can reduce fire danger.
(*I am using an electrical sheet reference from my electrician for these definitions)
- Arc Fault Circuit Interrupters (AFCIs) - devices that replace standard circuit breakers in the electrical panel. They detect arc faults and shut down the power immediately. (we installed a brand new panel and AFCIs & GFCIs before we started initial construction)
- Ground Fault Circuit Interrupters (GFCIs) - specialized outlets that have the best protection available against electrical shock. Found mostly in Kitchens and Bathrooms.
Lets talk about cost! Since doing these types of upgrades requires inspections with your counties/cities permit office, this can vary state to state, city to city. For us, we were charged $100 to inspect the entire electrical system, which included before and after visits to the home. We replaced our entire panel and installed the new breakers (since push buttons are not to code these days) and upon gutting our walls (which we are lucky to be able to have done) we ran all new electrical wiring. We had all these costs, plus our electrician (I wish I would have took up electrical because those boys make big bucks!) - when you factor in the AFCI's, which run anywhere from $25 to $50 and the GFCIs, at $5 to $10 and the help of Menard's (SHOUT OUT) for their 11% sale on everything, we have a small fortune wrapped up on our project. I know that it costs some dough, but in the long run it was a great investment. We sleep easy at night knowing that we are up to code and our house will not catch fire. Plus, we have a great electrical system!

2. Old or leaking oil tanks...
I can remember the first time I came into the home and went to the basement (creepy) and in the far back room (because, YES there are several rooms down there- eek!) there is this huge oval drum tank unit thing that sits about 4 feet off the ground on heavy duty legs and I was like, what the heck is this thing? This is when I got schooled! My first question, how do we get rid of it? (simple enough question, right?) I was informed that we don't! It is part of the house and there is NO POINT in us moving it, since it was full and would be a mess and it wasn't hurting anyone being there anyways.
Many old home relied, and still may, on oil fuel. The fuel is either stored in tanks, like ours, in the basement, or buried in the yard. Usually, the old steel tanks have a life expectancy of ONLY 10 years, 15 tops.
If the tank is buried, you could have a mess if that tanks started to leak, like tens of thousands of dollars worth of damage. The problem is that with the short life expectancy, the tank could disintegrate and leak into soils, wells or waterways causing a disaster.
If you have a tank in your house, you want to make sure that there is not any oil spots under the tank. You also want to know your tank, i.e. How old is it? What type is it? Also, try to measure the thickness of the steel by looking at the bottom section of the tank, which is also the area that is more likely to be corroded. Note that water is not good for the tanks,so look for rust or debris in the oil filter or burner.
We are pretty lucky, our tank is solid, the basement is a dry, cool place, so it is still holding strong. Hubby does check it when he goes down to make sure that he is not finding puddles, because ours is still full and we are for certain that it has not been used since the last sixties at least.
If you think you might have a tank outside your home, try to track it down by looking for fill pipes or vent pipes that should be sticking out of the house or yard. You will also know if there is a bad leak, as it will be obvious to the naked eye. Hire a pro if all else fails. They will be able to test surrounding soil and do a low-pressure test on the tank itself to test for leaks. If you suspect any water, have the oil company pump it out!
If there are no leaks, above ground or with the buried tank- you can abandon it in place. They say to make sure the tank is empty (ours is not) and leaving it. If it is empty they strongly recommend emptying it and if it is a buried tank, fill it with sand.
To have your tank - above ground- tested to see gauge of steel and if it is in fact full, it can cost roughly $125. (which is a reason why ours still lies full!) To remove or replace, it can vary. Removing an old above ground tank, with install of a new one can range from $2000 to $4000 respectively. OUCH!
3. Radon
If you have never heard of Radon before, it is a cancer causing natural radioactive gas that emerges from the ground. You can't see it or smell it but it kills 20,000 people annually in the U.S.
I first heard of Radon when my Grandparents, who lived a block away from our house, were getting ready to sell, they had to do a Radon Check and guess what, they were active! It costs upwards of $10,000 for treatment- not a cheap fix there!
How to know there is a problem: Radon dissipates naturally into the atmosphere; every home that sits on or in the ground has it, but some homes trap it too well. Homes with a radon level of 4 pCi/L (picocuries per liter) need to be fixed! (Grandma and Grandpa felt this fix!)
It is recommended that you test to know your home's level. Test kits are cheap $20 and easily available. To have a pro come out and test, will range from $125- $150.
So, what do you do? If you get a reading slightly over 4 pCi/l you might want to do a long-term test through a pro before deciding whether to fix the home. If you find yourself way over this mark, you need to get your home fix quickly.
The solution starts with sealing cracks in foundations, installing a "radon-reduction system"- which is a pipe-and-fan venting system that goes from the basement floor through a wall.
Depending on your Radon Problem, a few pipes might be needed. Expect costs of a fix to start at $1000 and upwards.
4. Lead Paint
Lead paint seriously harms development in fetuses and young children. Hence, why we gutted Gray Gables! Lead pain was really popular in homes built before the 1940s. It was banned in 1978!
Lead paint in a home is something that CAN be managed and lived with. Surprised?
Look for feeling or flaking lead paint that children could put in their mouths, or that would reveal old lead paint underneath. You can also hire a professional to analyze your home using a special "gun" that can be pointed down a wall to determine lead paint usage.
Leads main danger in the home comes at the windows, where paint gets worn off and then recesses into the air.
Whatever you do, DON'T stir up the lead! If your walls are not peeling or flaking, you can most often just paint over them. If there is anything coming off though, you need to remove the loose stuff and paint over it!
Or, you can do what we did and tear all those old walls down (except for the living room, I have 1 wall remaining that is original) and starting over with new drywall and lead free paint! Be sure to use plastic to separate the area during demo from the rest of the home so that the lead getting into the air does not adhere to other areas of the home!
Cost: this will vary! We did not go the professional way, but it looks like just to test is $500. For removal, it varies based on scale of project!
5. MOLD!
Oh Mold. How I despise you! Mold is all around us- spores constantly floating around the environment. Damp indoor spaces, like floors, walls and carpets- provide a great place for spores to settle down and start growing. (ewe)
Mold can irritate respiratory problems like allergies, asthma and cold like symptoms like a stuffed up nose, watery eyes- the works!
Mold often makes itself known by its musty smell and the illness you feel. You need to stop any leaks and condensation to cut off the problem from getting worse. Also, consider an air test!
If you notice mold on the surface, remove using commercial products, soap and water or a bleach solution. (I have a bleach/water spray bottle that I keep it the bathroom to kill it before it starts!) If you have mold deep down where you can't clean or treat, you will need to remove and replace.
Mold testing costs about $200 to $300 for a few air samples with a follow-up report. Since the extend of mold can be problematic, the fees for mold remediation can vary!
6. Lead in the water (wait, not Algae?)
Lead is bad for small kids because it is absorbed faster by them than adults, even at low levels. It can harm brain, kidney and nervous-system development. Drinking contaminated water with lead is common in old homes because many homes built in the early 1900s used lead pipes for plumping indoors.
The only way to tell if you have unsafe levels of lead in your water is to test.
You can look for lead pipes, which should be easy to spot- they are a dull gray color and can be scratched with a key. If your home has copper plumping, or chrome-plated fixtures which are usually made of brass have lead solder. If you find corrosion, or rust in old bathtubs, the water is a rust color or your laundry is stained, you have high levels of lead in your water. Another note is that if you rely on a private well, you are more likely to have lead plumbing.
So, now you know you have lead pipes leading to your faucets, what do you do? Well, Brita filters or other lead-blocking filters can be a solution. You can also look into a whole-home purification system- but to use either of these, you have to determine how much lead you have and its main source!
You can also buy a test kit, which at most home improvement stores in Ohio area generally are $25 and up. If you choose a filter,you are looking at $25 for the pitcher or several hundreds of dollars for the reverse-osmosis units.
We re-plumbed. We had an old tub in the bathroom that was heavily stained from the faucet dripping and upon further findings, we chose to start from scratch! It is costly and messy, but if you are already opening up you walls, it makes sense to upgrade to the PVC.
7. Asbestos...
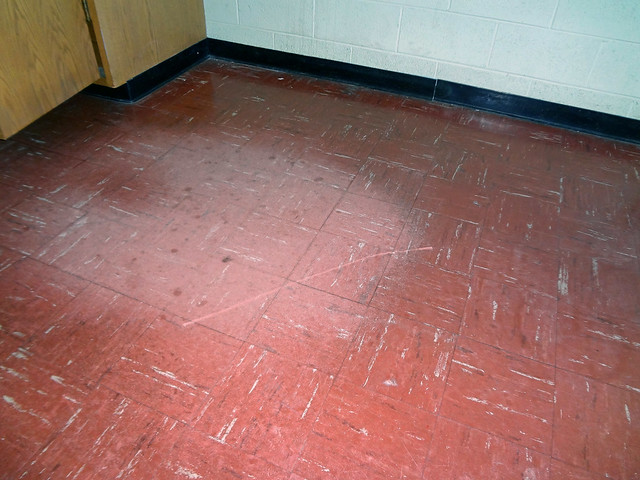
This stuff is a pain! We had a whole linoleum floor that was full of this killer. It required masks for a month with our family upon removal. When the fibers of asbestos' are released into the air and if inhaled, this is a number one source of lung cancers or asbestosis, a serious scarring of the tissues of the lungs for which there is no treatment. This is what took my Grandfather's life- luckily, not from my house, but he was a firefighter and when old buildings went up and people didn't know about asbestos, the cancers formed and it all lead back to a huge asbestos fire he found in the seventies.
See, as a strong heat and chemical-resistant material, it was used all over the place- in ducts, exhaust systems, roofing shingles, floor tiles, glue, that fake snow people used to spray on their Christmas tree. That is a crazy fact!
They say that if the asbestos lives in the house, it is NOT dangerous unless it is friable or loose and entering into the air. If the material is in "good" condition, not worn out or frayed, there is no reason to not have it there. They say that if it is not bothering you, don't disturb it.
To find if you have asbestos, check pipe insulation and duct wraps, old worn tiles (this is where ours was), nail holes and deteriorated materials. Homes with asbestos were usually built or updated from the late 1930s through the late 1980s.
If you find asbestos and it is deteriorated, take action. Some jobs are simple and the asbestos is encapsulated or complex, like tearing up flooring and replacing- but they recommend leaving it to a contractor who has dealt with asbestos before and can handle the fibers entering the air properly. The inspection can cost between $375 and $675. Sampling can be an add on. It can be an expensive remediation but worth it in the long run.

So having an old home can be awesome, but it can be costly too! We have spent a small fortune, with a long way to go to take the extra steps to have a clean home for our girls to grow up in. That was our personal goal with our home. But I think that there are a lot of things you should ALWAYS be aware of before you take the leap of faith and jump into an old home. They are amazing, their history, the stories behind the foundation are one in a million, but there is a lot of things that can, and in our case, will, go wrong along the way. I guess it is kind of like buying a used car versus a new car- it isn't for everyone! I prefer my old house to a brand new house. I need the character of the home, the charm of the lives that once lived within the walls, the stories that have been passed down from one generation to another. That is the history buff in me. I also love that I get to incorporate some of those old time craftsmanship into my home and yet, keep in modern in its own way as well.
 |
| This is my house in the early 1900s |
 |
| This is my house today. (PS- that end green room is COMING off! Hallelujah) |
Thanks for checking out my BLOG!!
~Kel

 We are well into the half way point of year 2 of this OLD HOUSE project. I have half my siding up on the outside, half my drywall up on the inside and half of my tile floor down in my kitchen. (anyone else seeing a pattern here?) It has been one heck of a ride! We have had to beg and borrow, argue and fight- but in October, we walked through the front doors (I did say doors because there are 2!) into the bright yellow living room, with the massive fireplace and we got to say, This is HOME.


