Our property came to us as an empty canvas. We had an old farm house built in 1892 and the carriage house to match, both in ROUGH shape. Since then, we added a pond, a pole barn and have done a lot of work...with more to come! We made the conscious decision to add chickens to our property as a means to having endless fresh eggs. We started a garden and have been tending it as best as we could, learning so many things along the journey. From here...my biggest question is, where do we go? I am overwhelmed with laying out our little farm. So this is where the question comes in...
WHERE DO I START?

{LEARN YOUR LAND}
I think that the most important thing you can do is to walk your land, listen to your land and don't "jump" into your homestead dream until you plan and learn for at least a year to see first hand such things as where your water runs when it rains heavily, where pockets of snow are deeper, and where all the dry land lays.
Once you have this determination for your land, start with questions like,
- What do you like to eat?
- What do you like to do?
- What are your true passions for your homestead?
If you take pictures to document your land over the seasons, you can use these images to reflect on what would be an ideal placement for different ideas you have for the homestead. I, personally, am a binder gal, so this, along with my notes, wishes, dreams would all find their way inside.
The goal here is success.
Planning helps gain success.
A great example of planning is, say you want to plant an orchard. The determining factor for deciding on a location for such orchard would be , "Where do we have open space?"
I think that it is also important to think about growing what you like to eat. It makes the investment and final results so much more worth it because there comes a sense of pride knowing that your hands sowed the land to give you and your family food.
{AVOID AND REDUCE DEBT}
The first thing I’d advise is don’t get too far into debt because debt is enslavement. Do things that take time and not money and use your creativity to do for yourself.
 I would not recommend building your homestead by digging yourself into debt. Quite the opposite. If you happen to have debt, take that first year and try to get out of it.
 Reducing your monthly expenses will allow you to fit a new feed bill into the budget and ultimately give you so much more freedom to grow and expand when you are ready… not when the finances will allow.
{START SMALL, START SLOW}
 For many reasons “easing in” is one of the wisest things a new homesteader can do. Not only does it prevent burnout and help you stay out of debt, but it allows you to properly and thoroughly research each avenue you choose to explore.
  Starting slow, building knowledge, obtaining experience, gaining confidence, and working towards mastering each new skill will allow much of the work to be done effortlessly and as a matter of habit. Going about these new tasks habitually will go a long way to improving morale when there is a bump in the road.
And there will be bumps.
We started with a small laying flock. Just enough (six) to generate a great deal of excitement within the family and a feeling of productivity (with four eggs on average a day), like we are doing something other than just playing the waiting game.
Despite a lot of what you’ll read out there, chickens are relatively adaptable and probably the most foolproof of barnyard animals.
 They’ll keep you in at least a few eggs when everyone else is complaining of empty nesting boxes. After the 3rd or 4th year, cull out the oldest hens who are no longer laying and they can finish their contribution to the homestead by providing your family with a wonderful stock.
We started with older chickens who already were laying eggs.
It is recommended that you get a few new chicks each spring so you’ll have fresh layers in the fall when the older gals are molting and over the winter.  They’ll keep you in at least a few eggs when everyone else is complaining of empty nesting boxes. After the 3rd or 4th year, cull out the oldest hens who are no longer laying and they can finish their contribution to the homestead by providing your family with a wonderful stock.
You’ll also get the benefit of a new skill- chicken butchering.
This is the food chain, after all.
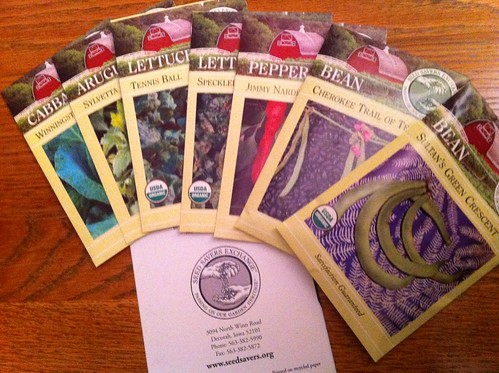
The second year on the homestead I would plant a garden in the spring. You could even start seeds in the late winter or early spring.
- You can start onions in January
- Peppers in March
- and tomatoes a couple weeks later.
 Make sure you mulch your garden. Mulching is a wonderful way to build soil fertility over time, reduce fungal diseases found in the soil from infecting your plants, and most importantly keeping the weeds at bay.
 Straw or hay mulching can take weeding from a daily chore down to a once-a-week chore.
As to adding too much else beyond the garden and the chickens I would be hesitant to do so.
It’s hard to be patient, but gardening and food preservation will take more time than you think.
Remember ease in. If you plan on putting in an orchard or berries, plant them in the late fall when the garden and all the related harvesting and food preservation isn’t consuming so much of your time.
Do that.
For successive years… well...
- What do you like?
- What “stokes your boiler?”
{BUILD SOIL FERTILITY}
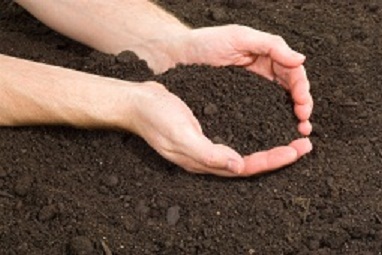 Assuming that growing food in the soil will be a part of every homestead, I would emphasize the importance of building the fertility of your soil. It is recommend doing so via mulching, cover crops, composting, and aerobic compost teas.
 Test your soil, make necessary holistic amendments using compost tea, compost, and mulch.
If you plan on putting in an orchard or berry patch in the first or second year, it is recommended that you take a whole year to prepare your orchard site for planting.
Fruit plantings happen in one of two ways. The go-getter turns the lawn under and, plop, the trees and assorted berries are in. No real transition toward the fungal state occurs prior to the nursery order being made and delivered. The soil biology can recover from such unbridled enthusiasm- it’s not “wrong” to do this- but soil preparation prior to planting offers certain advantages worthy of consideration. People with just a wee bit more foresight understand that a year of cover cropping and woodsy mulching not only offers the grower a chance to build organic matter and correct fertility imbalance but can also hasten fungal dominance.
Finally, having that new flock of layers will come in handy while you’re building soil fertility. Either by encouraging your free-ranging flock to congregate where you’ll be planting by laying down thick mulches for them to scratch through (and subsequently leave their contribution) or by proactively managing the manure of a contained flock via composting, the fertile manure of chickens will give your soil a big boost ahead of that first year of planting.
{BUILD SKILLS}
This does not mean that you can't be actively homesteading. There is still much that can be done. My next recommendation is work on building your skills.

You can spend your time reading and researching the ventures you plan on beginning with. Having that knowledge to draw on when you need it will be so helpful, allowing you to attack a problem immediately when it arises.
You could find a mentor. This part is not always easy, particularly if you raise your food unconventionally. (Not much sense wasting your time learning how to raise hogs in a barn on concrete if you want yours out on pasture.) If you could find a mentor to learn from, gleaning from their acquired wisdom and experience, what a blessing that would be!
{BUILD INFRASTRUCTURE}
If you don’t already have infrastructure in place, barn, buildings, fences, etc… the first year, while you are planning and observing is a great time to work on it (without going into debt, obviously.)
Having the whole year set aside to work on these projects will mean fewer impulse purchases.
Having the whole year set aside to work on these projects will mean fewer impulse purchases.
And if you already have these things in place, you could work on buying high quality tools and equipment. I emphasis high quality because frankly the tools you are going to get at a big box store are made for occasional suburban use. If you don’t buy high quality, plan on making an annual expense of the most used tools. (We have more shovel and rake heads than I can count!)
Finally, from the homemaker’s perspective, perhaps now would be a good time to get a mudroom if there isn’t one in your home.
Easing into building a homestead doesn’t mean that you can’t be busy building your new lifestyle. There is always much work to be done and, as you’ll soon find out, the work is never really done.
So relax and enjoy the simple life and all the blessings and challenges it has to offer.