Friday, September 25, 2015

Recipe of the day: CROCKPOT ITALIAN CHICKEN AND VEGETABLE SOUP

Crockpot ITALIAN CHICKEN and VEGGIE and QUINOA Soup


Crockpot Italian Chicken and Quinoa SoupIt’s a well-known fact in my family that I could eat sandwiches, soups, or salads every single day of my life and NEVER get sick of them. Salads in the summer and soup in the winter and then sandwiches year-round. #yesplease 
Well..the hubby, he is pretty different. He  likes a heartier meal (it doesn’t have to have meat, but he does like that) and tends to want soup only once every couple of weeks.  


Mix all those vegetables and the spices it what your left with is a super flavorful soup with not too many ingredients. Plus it is quite hearty with the chicken and quinoa! (Both of which need NO pre-cooking.!!!) #score
Delicious and EASY (dump it and forget it!) Crockpot Italian Chicken Quinoa Soup

The ingredient list is especially short if you pick up one of those pre-chopped veggie packs in the grocery store that has carrots, celery, and onion all chopped and ready to go. You guys know that I am all about easy-peasy. Then your prep is really insanely quick. I’m talking like 5 minutes quick. Not that it takes too long to cut up the veggies since you only need a cup of each.


CrockPot Italian Chicken, Quinoa, and 
Vegetable Soup
Prep Time:   10 Minutes        Cook Time:  4 Hours             Total:  4         Servings: 6-8
INGREDIENTS
  • 2 small boneless skinless chicken breasts
  • 1 cup chopped yellow onion
  • 1 cup chopped celery
  • 1 cup diced carrots
  • 1 and 1/2 teaspoon minced garlic
  • 3/4 cup uncooked quinoa, I used a roasted garlic flavored quinoa
  • 1 can (14.5 ounces) fire-roasted diced tomatoes
  • 6 cups chicken broth
  • 1/4 teaspoon red pepper flakes
  • 1/2 - 1 full teaspoon Italian seasoning
  • 2 teaspoons dried oregano
  • 1/2 - 1 full tablespoon dried basil
  • Salt and pepper, to taste preference
  • Parmesan Cheese
  • Optional: fresh rosemary, fresh parsley

INSTRUCTIONS


1. Lightly spray a slow cooker with non-stick spray. I used a 6-quart slow cooker for this recipe.

2. Add in the boneless skinless chicken breasts (no need to cook first), chopped yellow onion, chopped celery, diced carrots, garlic, uncooked quinoa (rinse to remove bitter saponin if your quinoa isn't pre-rinsed), and un-drained fire-roasted diced tomatoes.

3. Add in the broth along with all the seasonings -- red pepper flakes, Italian seasoning, dried oregano, and dried basil. Make sure to add these seasonings to your personal preference -- if you aren't sure you want as much of something leave it out until the end where you can slowly add it and taste test it. If you want to add more - go for it! I always do the red pepper flakes, 1 full teaspoon Italian seasoning (and sometimes more), the oregano, 1/2 tablespoon basil, 1 one small sprig of fresh rosemary, and LOTS of cracked pepper.

4. Cover and cook on high for 3-5 hours (Mine took 4 hours) or until the quinoa has popped and the chicken shreds easily.

5. Shred the chicken and return it to the crockpot. Add in any more seasonings to taste. Add in fresh rosemary and fresh parsley if desired.

NOTE: the longer this soup "sits" or cooks the more broth that gets absorbed into the quinoa. This makes it heartier and also less brothy. If you want a more brothy soup, watch carefully and remove from the heat of the slow cooker when it is your desired consistency. Alternatively add more broth as desired.
6. Top each bowl with freshly shredded Parmesan cheese.


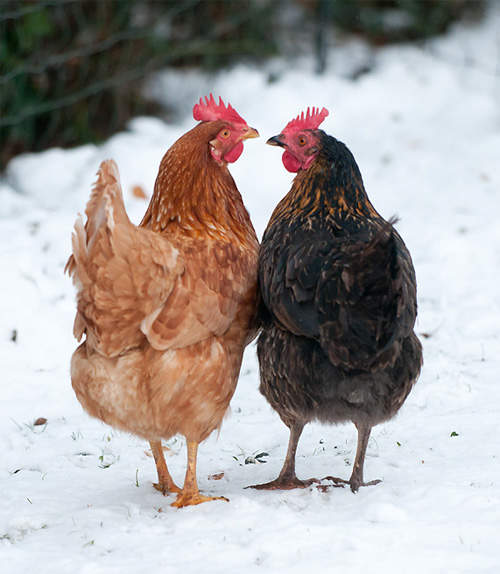
Surviving Winter with CHICKENS...


This will be our first winter with chickens and although it is kind of scary to think about. 

There are really only two things that are pretty critical to keeping our ladies alive and well during the cold, Ohio winter that is up and coming and that is: 


  1. making sure they have access to water (and not a frozen block of ice) 
  2. and a dry coop. 


We have been planning ahead to ensure that our six chicks survive and maybe even keep laying

Water is a very important factor with chickens, as it is an essential nutrient and a requirement to regulate a chickens body temperature, help with digestion, growth and yes, even producing those eggs. Lack of water access, even for a few hours can result in a major egg production drop for weeks

It is also important to note that chickens EAT MORE in the winter to help regulate their temperature and due to this they require more water to digest- if the water is frozen- your chickens will stop eating and will not be able to keep themselves warm. 


3 frozen water Solutions:
  1. Use a cookie tin heater.  For less than $10 and only 10 minutes of your time, a water heater can be made out of common, household stuff, which will keep water in plastic and even metal waterers liquid in those sub-zero, snowy temps. The thing is...electricity is REQUIRED.
  2. Use poultry nipple waterers. There are all kinds of nipple water systems that can be installed to ensure a water supply. You can even use a homemade system with a 5 gallon bucket, an aquarium heater to an already assembled unit with its own heating system, such as the Chicken Fountain.  Electricity if Required for this method as well. 
  3. You can HAUL it to your coop.  If you don't have access to electricity, traditional waters can be used but will need to be changed frequently to prevent freezing.  You should empty or remove at dusk and return fresh, unfrozen water first thing in the morning. I want to note that this is not the most efficient system, but with no other options, you will end up saving your brood. 


Now let's talk about MOISTURE.  


MOISTURE is the enemy, the boogie man, the *something in your closet. While, most chickens will tolerate  cold weather well, the freezing temperatures inside the coop in addition to the added moisture will cause FROSTBITE.  Chickens generate a great deal of moisture from breathing as well as from pooping, since droppings consist of 85 % water


Ventilation is key inside your coop. If you have windows in your coop, make sure you are checking for condensation build up. 


Frostbite usually occurs overnight in a cold, poorly ventilated coop


Frostbite affects combs, wattles, and toes and can interfere with egg production. 

Breeds with single combs are at the greatest risk for frostbite. Recommendations are to apply petroleum jelly to combs and wattles at night to prevent any moisture from clinging to them. It is unknown if this really prevents frostbite.

To control moisture in your coop, you can use a hygrometer with a relative target humidity of 50-70%. 

You can also use Dropping Boards, which are a shelf designated to collect chicken poop deposited overnight. The boards are scraped down every morning, and dropping removed from the coop.  The less droppings in the coop, the less moisture in the coop. 

Droppings can also generate ammonia, which can be a respiratory hazard to the flock, particularly in a closed coop. Dropping boards eliminated a major source of the humidity and ammonia. 

Not as if I need to say it, but DO NOT KEEP WATER INSIDE THE COOP. Controlling moisture from droppings is manageable with excellent ventilation, it is impossible to control moisture if the waterer spills in the bedding. There is no need for water in the coop. 


Use SAND for bedding
Sand used as a litter inside the chicken coop is a great choice in the winter because it evaporates moisture faster than any other litter and it stays dryer as a result. Sand also retains warmth longer and will keep coop temperatures more stable. Try some Sweet PDZ sprinkled in the sand to help control moisture and ammonia. 


Deep Litter is a method of chicken waste management that calls for droppings and bedding materials to compost inside the coop.  This method required careful management, which includes stirring, monitoring and moisture content.  The deep litter method, if implemented improperly, can cause serious health hazards to the flock. 


To properly manage: 
  • Don't change the litter every few weeks. 
  • Don't begin the process mid-winter.
  • Don't keep less than 4 inches of litter on the coop floor.
  • Don't use diatomaceous earth (DE) in the litter.
  • Don't relay on the chickens to do all the turning.


Insulating is intended to retain radiant heat and reduce heat loss, making it more feasible to ventilate coop, but insulating a coop does NOT mean making it air-tight. If there are gaps that are not being used for ventilation, seal to prevent drafts.  

Insulation also must be hidden from your chickens, or..you guessed it...they will EAT it! 


A great tips is to use feed bags for covering the insulation.

If you have heavy winds, it is important to insulate the roof and use a heavyweight plastic to cover the wind side. 


And just a note- do not use straw or bales of hay inside the coop as insulation. Mold and fungus and even mites grow inside hay, which triggers that respiratory issue within the coop. Far better to have a cold coop than sick chickens. 


Wednesday, September 23, 2015

Recipe of the day: Parsley Pesto Pasta w/ blistered tomatoes

Parsley Pesto Pasta with Blistered Tomatoes - BudgetBytes.com


Parsley Pesto Pasta with Blistered Tomatoes
  1. Prep time:    10 mins
  2. Cook time:   20 mins
  3. Total time:   30 mins
  4. Serves: 5
Ingredients

For the Parsley Pesto
    Parsley Pesto Pasta with Blistered Tomatoes - BudgetBytes.com
  • 1 bunch Italian (flat leaf) parsley 
  • ½ cup grated Parmesan 
  • 2 cloves garlic 
  • ¼ tsp salt 
  • 1 fresh lemon 
  • 6 Tbsp olive oil 

For the Blistered Tomatoes
  • 1 Tbsp olive oil 
  • 2 pints cherry tomatoes 
  • salt & pepper to taste 

For Serving: 
  • 1 lb. pasta (any shape) 
  • 5 Fried eggs (optional) 

Instructions
  1. Rinse the parsley and drain well. Pull the leaves from the stems and place them in a food processor with the Parmesan, garlic, salt, zest and juice from half the lemon (about 2 Tbsp juice). Pulse the ingredients until they are finely chopped. Slowly add the olive oil through the spout while the processor is running until a smooth paste forms. Set the pesto aside.
  2. Heat a large skillet over medium flame. Add one tablespoon olive oil, then tilt the skillet to coat the surface. Add the tomatoes and cook 7-10 minutes, stirring occasionally. Avoid stirring the tomatoes too often to allow them time to blister on the hot skillet. As they cook the skins will burst and the tomatoes will release juice, which will thicken into a semi-sweet glaze. Season with salt and pepper to taste.
  3. Bring a large pot of water to a boil for the pasta. Cook the pasta in the boiling water according to the package directions, or until al dente. Reserve a small amount of the starchy cooking water, then drain the pasta in a colander. Allow the pasta to cool slightly, then return it to the pot (with the heat turned off). Add the pesto, then toss to coat. If the pasta is too dry or clumps, sprinkle a little of the reserved cooking water on top to loosen.
  4. Divide the pasta among five bowls, top with a scoop of the blistered cherry tomatoes, scraping up some of the sweet glaze from the skillet as well. Top each bowl with a fried egg, if desired.


Hello.....A U T U M N (2015)


Let the adventures that are FALL begin!  

I have the BUCKET LIST of things to GET DONE this fall! 

 Let the leaves kiss the ground, let the crisp air lead us to our jackets and let the smell of 

(from Pink Zebra) 

fill Old Gray Gables!


Animal House! Six things to know about having Baby Bunnies...


The "A" Family is batting around the idea of adding another bunny to our "farm", but it has brought up a lot of questions, along the way.  


Obviously, we have Miss Luna: 

  • who is a girl
  • has a massive house (thanks to Hubby) ... 
  • she is a Holland Lop, which is what I would look for in our new addition...


But do we get another girl or a boy this round? 

I am not afraid of having baby bunnies, especially Holland Lops. I think that it would provide a great learning experience for the girls and allow them to see life happen, bunny style. But, never having had baby bunnies before, it kind of made me do some research into having baby bunnies and what to do (or not to!) that I thought I would share for anyone else who might be interested in this adventure as well!


Six Things to KNOW about Having Baby Bunnies: 


1. Take care of the mom rabbit. The mom cares for the baby rabbits until they are old enough to eat pellets. However, the mom needs extra special care and nutrition while she has her young within her, so that she can provide them with the milk they need.


2. Make sure you have a nest box for the babies to be born in. If you let the mom have her babies on the cage floor they will die. You should stuff the nest box with grass hay or timothy hay and shavings on the bottom of the box. Don't fill it too high or have any holes in the box, or the babies may escape.
  • The mother rabbit will pull fur from her belly/ chest area and put it in the nest box if she is going to have babies, this helps keep them warm. She may also rearrange the materials you put in the box, and pick up huge mouthfuls if the stuff.

3. Check for dead rabbits. Soon after the rabbits arrive, tempt the mom away from the nest box with a treat and take the nest box out of the cage. Look through the fur for any dead kits, or placenta/after-birth and remove them. Don't worry about touching the live rabbits, the mother shouldn't be bothered by your scent. But if you are worried about your smell on the kits, just put a dab of vanilla above the doe's nose.


4. Foster the rabbits if there are more than eight. If the doe has more than 8 kits, you might want to consider fostering one or two to another doe that has a litter of under eight. Only foster if both litters are the same age. You should also add a few baby rabbits, if you only have one; this keeps all of the babies warm.


5. Make sure to check on the kits every day and handle the babies, it will make them tamer. But make sure they are warm while you take them out, as baby bunnies can get chilled easily.


6. The baby rabbits will start to eat pellets at around 3 weeks of age, and will be weaned at 6-8 weeks of age. Never feed baby rabbits greens until they are at least six months old.


Some additional notes: 
  • Do not bother the mother rabbit. She may get anxious or scared and she could kill or hurt the babies.
  • The size of the litter will typically depend on what type of rabbit you have. (1-12 for larger breeds, and 1-10 for smaller.)
  • Fed the mom with nutritious foods, as she provides the main source of food for the bunnies.
  • There is a type of baby born commonly called a 'peanut' baby rabbit. It is extremely small with a large head and tiny ears; these almost always die. (i.e. they do not have a growth gene so they can't physically grow. Peanuts ONLY occur with small "dwarf" breeds, i.e. Holland Lops/Netherland Dwarfs)
  • Be sure to keep the mother well fed. She will not feed her babies if she is not eating. 
  • Mother rabbits never move their young, so if one leaves the box you'll have to put it back. Don't worry, the mother will keep taking care of the baby even if you touch it.
  • Do not be concerned that the mother isn't spending time with the babies. Rabbits do not sit with their litters as cats and dogs do, as in the wild it would attract attention to the nest. Rabbits only go into the nest to feed the babies once or twice a day.
  • Baby rabbits are born without fur and with closed eyes.
  • When the baby rabbits are at the age that they can start eating hay and pellets, feed them Timothy Hay. Timothy hay provides the babies with lots of fiber. 
  • Rabbits commonly lose their first litter, so if you want babies don't give up hope! It takes some does (female rabbits) 4-5 litters before they get the hang of it.
  • When they first have their babies just leave them alone until the doe leaves the nest.
What is happening in this picture? Where is he or she going? What will happen next? What is on the grocery list?:
10/9/2015- Updated per some suggestions provided from http://www.hollyshollands.weebly.com/


Featured Post

How To Make Your Blog Go Viral

Blogging, Lessons on working, Stay at Home Moms by: Kel Amstutz Last year, I posted a blog post that went viral . (much to MY surp...